Lost and found: How to recover missing files on your Mac

Please take a deep breath; it might not be so bad

We’ve all been there. That sinking feeling when you can’t find a crucial document, a precious photo, or that video project you’ve been working on for weeks. It can feel overwhelming, especially when deadlines loom, or memories are at stake. But before you panic, take a deep breath! Macs have built-in tools and features to help you recover those lost files. Even easier, there are a few things you can do in your attempt to find missing files that won’t takewon’thing more than your time to search. 

Here’s a sHere’s-step guide to finding lost files on your Mac:

1. Retrace Your Steps

Start with the simplest solution. Is the file mistakenly minimized or hidden behind another window? Sometimes, files can end up behind other open applications. By cycling through your open applications, check if your file is minimized in the dock or hidden behind other windows. If you suspect you accidentally renamed it, consider recent changes and try variations of the original name.

Take a moment to browse through your recent applications and documents. Most operating systems have a ‘Recent’ section where you can quickly access open files, which might help you locate the missing file without searching extensively.

Next, use Spotlight, the powerful search feature represented by the magnifying glass icon in your menu bar. By clicking on it or pressing Command + Space, you can begin searching for your file. You can enter the file name directly, but if you’re unsure of the exact name, try searching by content or file type—Spotlight can also display results based on keywords within documents. 

In addition, consider narrowing down your search by adding file type keywords, such as “.docx,” “.pdf,” or ” .jpg” to help refine the results. You can also use filters in the Finder application to search for files created or modified within a specific time frame. If your search is still unsuccessful, checking the Trash to see if the file was accidentally deleted might be helpful. Remember to be thorough, as sometimes files can be overlooked.

>>>A2527 Battery for Apple MacBook Pro 16″ Late 2021 A2485 A2780

2. Keep looking

Don’t forget to check the Trash! Your file might have been accidentally deleted. If you find it there, drag it back to your desktop or another folder to restore it. Remember, files in the Trash can be permanently deleted after a certain period, so it’s best to check regularly if you suspect something is missing.

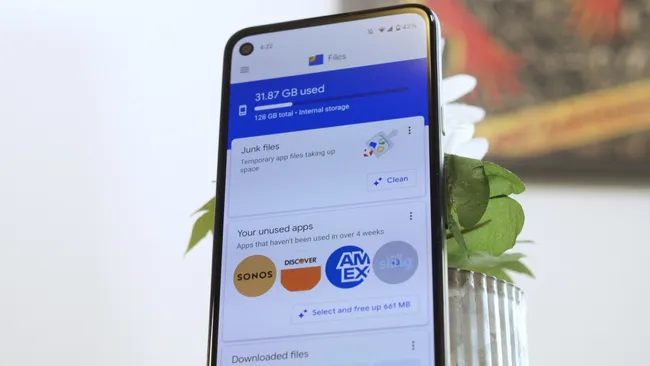
Many files, especially those downloaded from the internet, automatically land in the Downloads folder. To make it easier to locate these files, you can sort them by date or type within the Downloads folder. This way, you can quickly find what you’re looking for amidst all the other downloads.

Finder is your friend! Use the sidebar to easily navigate different locations like Documents, Pictures, and Applications. The sidebar lets you quickly access external drives or cloud storage if you have those setup. You can also use Finder’s advanced search options to narrow your search. With these tools, you can filter by specific file types (likePDFsor images), set a date range to look for recently modified files, or even search by keywords within the file name. This will significantly streamline your file management process!

>>>A1993 Charger for Apple Mac Mini A1993

3. Unleash the Power of macOS

If you have Time Machine backups enabled (and you definitely should for data safety!), restoring previous versions of files or entire folders is straightforward. First, open Time Machine by clicking its icon in the menu bar at the top right of your screen. Once it’s open, you’ll see a timeline on the right side of the display, allowing you to browse through your backups. You can use the arrows or the timeline to navigate to the date the file or folder was last present.

When you find the file, you can select it and choose the option to restore. Time Machine will replace the current version of the file with the one from the backup, and you can also choose to restore the file to a different location if you want to keep both versions.

If your file was stored oniCloud Drive, you can access it from anyAppledevice logged into the sameiCloudaccount. Open the Files app on your iPhone or iPad or access iCloud Drive through Finder on your Mac. All your files, including any changes made from other devices, will be synced and available. You can also use the iCloud website to access your files from a non-Apple device, ensuring you never lose important documents. Regularly check your iCloud storage to maintain enough space for backups and files!

4. Go deeper

For tech-savvy users, the Terminal provides a robust set of commands for searching files effectively. A handy command is `mdfind`, which leverages the Spotlight index to search for files not only by their names but also by their content. This allows users to locate specific documents, images, or files quickly. For example, typing `mdfind report` will return all files containing the word “report” in their name or contents. Refining your search using additional parameters, such as limiting it to certain file types or directories is also possible.

However, while Terminal offers powerful capabilities, proceeding with caution is essential. Commands can significantly affect your system, so ensure you know the syntax and potential outcomes before executing any commands.

If traditional search methods or Terminal commands fail to yield results, you might consider using data recovery software as a next step. Several reputable third-party applications can deeply scan your hard drive for deleted files, analyzing existing data structures to find remnants of lost information. Some popular options include Recuva, EaseUS Data Recovery Wizard, and Disk Drill. These tools often come with user-friendly interfaces and can guide you through recovery, increasing the chances of retrieving valuable files that may have been accidentally deleted. Select a recovery tool that suits your operating system and meets your specific need.

Tips to prevent future file loss

Here’s a few helpful steps you can take so you have less of a problem finding files in the future. 

Organize your files: Create a logical folder structure and stick to it. This makes it easier to find files and reduces the risk of losing them.

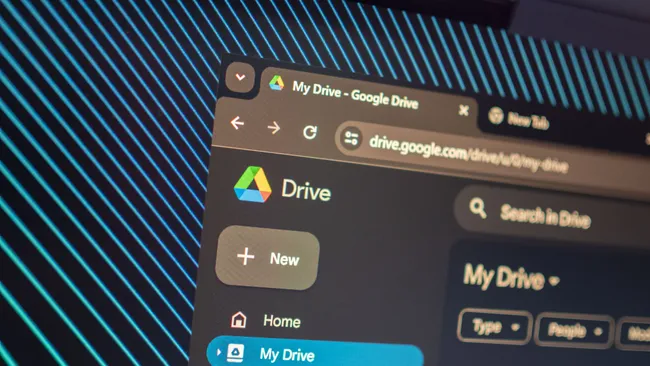
Use cloud storage: Services like iCloud Drive,GoogleDrive, and Dropbox provide a backup of your files and allow you to access them from anywhere.

Regularbackupsare essential: Set up Time Machine or another backup solution to regularly back up your entire system. This is your ultimate safety net against data loss.

Following these tips can significantly increase your chances of finding those lost files and prevent future headaches. Happy hunting!

Files by Google has a new PDF viewer, and it’s ditching Google Drive

It’s all about a better viewing and sharing experience.

What you need to know

  • Google is rolling out a new PDF viewer for the Files by Google app, as it shared in a recent update to the app’s Play Store listing.
  • The old PDF viewer incorporated Google Drive, but now, the new one is specific to Google Files.
  • It’s easier to share, star, and take actions while viewing a PDF while using the new Files by Google interface.

Files by Google is getting a minor upgrade that could improve your PDF viewing experience. The app is rolling out a new view that leverages a custom PDF viewer, rather than using the integrated one fromGoogle Drive. This will make accessing certain options easier, such as starring a PDF or sharing it with others. Alternatively, you can still use the PDF viewer in the Google Drive app if you prefer the previous user-interface.

Google previewed the change in an update to the “What’s new” section of the Files by Googleapp listing onthe Google Play Store. “Over the next few weeks, we’re rolling out improvements to your experience with PDF files,” the note reads. “Print, find content, or access markup tools whenever you open a PDF in the Files app.”

9to5Googlefirst spotted that the change was rolling out to users of version 1.5687 of the Google Files app after a server-side tweak. Android Central confirmed the new PDF viewer on its devices, but notably, one device had to be updated toAndroid 15before the change took effect.

You can see the new look of the PDF viewer in Files by Google in the screenshots below.

>>>W18-030N1A Charger for Google Home Nest Hub Max Audio Charger

From left to right: Old PDF viewer, new PDF viewer, new PDF viewer + overflow menu.(Image credit: Future)

Now, the overflow menu lets you access key options that weren’t available using the previous UI. With the old version, some menu buttons were only accessible through the list view of documents in theFiles by Google app. They weren’t there after the PDF was opened using the external Drive viewer, but that has been rectified with the new Files by Google custom PDF viewer.

TheFindandSave to Driveicons have been replaced withStarandShareon the new viewer. These can be pressed without opening the overflow menu. The new overflow menu includes more options, includingUse as,Open with,Move to Trash,Move to,Copy to,Move to Safe folder,File info,Find in file, andPrint.

Finally, the markup button (floating action button) has been redesigned, and some files will have aGoogle Lensbutton above it that quickly opensCircle to Search.


AirTag 2 could match the latest iPhones with huge upgrade on new chip

Apple introduced its first object tracker all the way back in 2021. In typical Apple fashion, the company hasn’t said a word about an upgrade, but as per reliable reports, theAirTag 2 has moved to the “manufacturing tests” stagewith an added focus on privacy measures.

Now, Bloomberg’s Mark Gurman has shed more light on the biggest hardware upgrade destined for the second-generation AirTag. In the latest edition of hisPowerOnnewsletter, Gurman writes that the object tracker will get a more powerful UWB chip.

UWB, short for Ultra Wideband, is a short-range radio technology that enables spatial awareness. In the Apple ecosystem’s context, this tech stack allows Precision Finding to facilitate accurate distance and direction guidance for object tracking.

AirTag next to an iPhone.

The purpose of Precision Finding is to offer more precise location and navigation instructions to users as they attempt to find their misplaced gadgets. In its current iteration, users get visual cues on the screen in the form of large arrows and distance estimation, alongside sound and haptic cues.

So, how good is this new UWB chip fitted inside the AirTag 2? As per Bloomberg, it will be “on par with the one introduced in the iPhone 15.” To recall, Apple equipped theiPhone 15andiPhone 16series with its second-generation Ultra Wideband chip.

The UWB fitted inside the current-genAirTag offers a range of 10 metersor roughly 30 feet. The second-gen UWB chip will reportedly triple those numbers, which means the minimum location-finding range will climb up to 30 meters.

An AirTag sitting next to an iPhone.

The UWB-powered Precision Finding feature is available for the iPhone 11 and all its mainline successors to date. On the iPhone 15 and 16 series, thanks to the second-gen UWB chip, Precision Finding also allows users to find a friend nearby using the Find My app.

>>>616-00659 Battery for Apple iPhone 11 Pro

In addition to an improved UWB chip, Apple has reportedly tweaked the internal design and made it more difficult to tamper with the speaker assembly. That’s a thoughtful change and would dissuade bad actors from illicit activities like stalking and theft.

Back in 2022, “silent AirTags” with their speaker kit removed popped up on online platforms like Etsy and eBay. Such object trackers are much harder to find without the beeping sound produced by the onboard speaker, especially if the device is hidden well or concealed tightly.

Y’all, Google might be in trouble. Then again, maybe not

iOS 18.2 had me thinking that Apple’s Magic Eraser competitor was better, until it didn’t.

Shortly after Apple released the third iOS 18.1 Developer Beta,I decided to seehow well the new “Clean Up” feature would stack up against Google’s Magic Eraser and Samsung’s Object Eraser. What I ended up with was a thing of nightmares when trying to remove the harness from my dog in a picture.

Samsung and Google both did a good job, but that didn’t come as much of a surprise, given that these tools have been availableon various phonesfor some time. Truthfully, I didn’t think Apple’s Clean Up would be a viable option and that it would just disappear into the night.

As it turns out, the complete opposite happened, as the stable build of iOS 18.2 arrived this week, packed with “Apple Intelligence” features. Hidden in the midst of the new AI features was an update to the Clean Up tool, which Apple has been apparently working hard to improve.

After being prodded a bit, the most obvious way to see if Clean Up is actually better was to try it on the same picture from before, using my iPhone 16 Pro Max. Much to my surprise, Apple didn’t try to mutilate my dog, and the entire process was a lot easier than I expected.

Because we’re working with smaller objects, there’s a lot of room for error when making selections. But after loading the picture and tapping the “Clean Up” option, it was as simple as just tracing a line along the harness. The tool then highlighted exactly what I wanted to have removed before automatically doing just that.

Also:A2830 Battery for Apple iPhone 14 Pro Max

Leia is standing in the yard with a harness and lead before edits.

Apple Clean Up results using iPhone 16 Pro Max.

The results were more impressive than I thought they would be, so I figured I would try usingMagic Eraser in Google Photos. Seeing as it’s been a few months since the last time I tried this out, surely Google would still come out on top, right?

First, I tried using Google Photos on my iPhone since it has Magic Eraser. The results were less than stellar, and it took longer because I had to select the harness in sections. Eventually, I got there, but you can obviously see where the edits were made.

Then, I thought that I might get better results by using Magic Eraser on myPixel 9 Pro Fold. After transferring the full-resolution photo and opening it in Google Photos, somehow the results were worse. There’s some weird line along my dog’s back, and her ear is even more crooked than normal.

Magic Eraser results using iPhone 16 Pro Max

Magic Eraser results using Pixel 9 Pro Fold

Maybe it’s just a fluke or something to do with this picture specifically. So, I did the next logical thing, picking a different picture before using Clean Up and Magic Eraser. This time, I opted for something that would probably be more common — removing people from the background.

I’m not sure if it’s just something that I’m doing wrong or what. However, neither the iPhone’s Clean Up nor the Pixel 9 Pro Fold’s Magic Eraser did a particularly great job. Both results lookfineuntil you start to zoom in and pixel-peep where the people were removed.

Also:GUKD8 Battery for Google Pixel 8 Pro

Apple Store photo before making any edits

Apple Clean Up results using iPhone 16 Pro Max

Magic Eraser results using Pixel 9 Pro Fold

When I started writing this, I didn’t really have much more to add, hence the first half of the title. But then I went back into Clean Up to make sure that it actually recognized the entire harness at once and that I wasn’t just imagining things.

So I pulled up the picture of my dog again, confirmed that the harness was highlighted, and then was greeted with the following.

Safety Filter applied after using Apple Clean Up on iPhone 16 Pro Max

Imagine my confusion when Apple applied a “Safety Filter” to the picture when all I was trying to do was remove the harness. I tried it again, just to double-check, and again, the Safety Filter was applied.

I understand the idea and premise of such a feature — and yes, it’s a feature, not a bug — but this is the same picture that I had already been editing before, and it’s just my dog standing outside with her harness and lead attached. So, I’m not even sure of the logic taking place here.

On the one hand, I commend Apple for including the Safety Filter to begin with. On the other, why was it thatApple Intelligencewas able to properly edit the photo 10 minutes before, only to incorrectly apply the filter on thesame image? It’s left me genuinely perplexed, and all I can hope is that this isn’t a regular occurrence.

That being said, even with the aforementioned hiccup, it’s tough to argue with the results. In just a few months, Apple has made some pretty big improvements to its Clean Up feature. Now, I have to wonder whether Google will lean on Gemini to improve its own Magic Eraser or if Apple will end up surpassing it.

Also:GS35E Battery for Google Pixel 8

North star: why the Oppo Find X8 Pro phone wins for travel shots

Oppo Find X8 Pro Master Mode

If you are off on a Christmas break, or just looking forward to getting away next year, the Oppo Find X8 Pro is a very appealing Androidsmartphonefor travel photography, reckons Aria.

I’ve recently come back from a press trip to Norway with Oppo, testing theFind X8 Pro. Although the trip was short we went to some amazing places around the very northerly town of Tromsø – the third largest urban area north of the Artic Circle.

While Tromsø is not an obvious destination in December if you suffer from Seasonal Affective Disorder – sunrise isn’t until around 9am and it’s dark by 1.30pm – the local scenery is truly spectacular.

As a curtain raiser to my colleague Amy Davies’s forthcoming full review of the Oppo Find X8 Pro, I’m sharing some of my early impressions of the phone from the perspective of travel photography.

Also:BLPA39 Battery for OPPO Find X7

Oppo Find X8 Pro key features at a glance

  • Quad 50MP camera setup
  • 50MP 15mm ultra-wide 1/2.75″, f/2.0, AF
  • 50MP 23mm wide 1/1.4″, f1.6, OIS
  • 50MP 73mm Periscope, 1/1.95″, f/2.6, OIS
  • 50MP 135mm Periscope, 1/2.51″, f/4.3, OIS
  • 4K 60fps Dolby Vision HDR video recording
holding the oppo find x8 pro in front of the louvre

XPAN excitement

The Oppo Find X8 Pro has a lot of cool features, but one that came in very handy during boat trips to the fjords and the rugged Senja island was the XPAN mode. It’s a really great tool for panoramic shots.

Basically, XPAN is a shooting mode which allows you to take quick and easy panoramic shots in the 65:24 format. Readers with a longer memory may remember that the XPan / TX-1 line of cameras emerged through a collaboration with Fujifilm and Hasselblad in the 90s, and the ‘Cinemascope’ look has been been emulated on the Oppo Find X8 Pro (Hasselblad’s Master Camera System is a key selling point of the new phone, further cementing the tie-up between two companies).

The resolution of images made with the XPAN mode is 7872×2912/ 2912x 7872 with 15mm, 23mm, 73mm and 135mm optical zoom options. The final file format is JPEG/HEIF and you can also choose to shoot in black and white (no further filters are available, however, and you can’t shoot in raw).

Anyway, as you will see from the gallery below, I found the XPAN mode to be really handy on the trip. It’s notnew, first appearing on the Oppo Find X5 series, but remains a big selling point – along with actual new features, which include AI Telescope Zoom and Lightning Snap (something Amy will explore more in her full review).

XPAN is certainly quicker and less fiddly than using the Panorama mode on Android phones, especially if, like me, you find yourself on a windswept boat in sub-zero temperatures. It should generate smallish but attractive prints, too.

Also:BLPA37 Battery for OPPO Find X7 Ultre

Note: I straightened some of these these images and slightly boosted the contrast owing to the challenging shooting conditions, but otherwise there has been no further editing.

Hasselblad Master Mode

I also get decent results with the Hasselbad Master Mode on the Oppo Find X8 Pro, which claims to add the ‘Hasselblad look’ to your images. As the name suggests, Master mode allows you to shoot in JPEG or raw, with manual control over exposure.

You can get some great results, but I did find myself wishing for a much wider choice of filters.

The Master Mode was perfect for making the most of a short and very chilly sunrise on the fjords. f/1.6 @ 1/125 sec, ISO 50

I also noticed the colour temperature on the Master Mode veered towards the cooler side (though I guess that was apt for Norway). Generally, though, I was pleased I had the Oppo Find X8 Pro on this year-end trip, and the phone seems another great Android choice for keen photographers.

Apple TV gets improved projector support in new tvOS update

The Apple tvOS 18.2 has arrived with improvements for 2nd and 3rd generation Apple TVs. Enhancements include support for more cinematic aspect ratios for projectors and displays. Plus, there are new screensavers and a dialogue-enhancing tool for a connected HomePod (2nd generation).

The Apple tvOS 18.2 update is rolling out to users. (Image source: Li Lin via Unsplash)

The Apple tvOS 18.2 update is rolling out to users. (Image source: Li Lin via Unsplash)

Apple has released a new update for the Apple TV 4K and the Apple TV HD,tvOS 18.2. This follows the launch oftvOS 18in November, a major update adding new InSights, smart subtitles and a redesigned Apple Fitness+.

The tvOS 18.2 release brings support for 21:9 and a range of other cinematic aspect ratios to the Apple TV. This provides users with an enhanced viewing experience on a compatible projector or display. Plus, you can now get an ultra-widescreen view on a FaceTime call. It is worth noting that these improvements only affect theApple – TV 4K (3rd generation).

For 2nd generation models onwards, the update also brings new Snoopy and Woodstock screensavers, dynamically adapting based on the weather, day or current holidays. On top of this, the Enhance Dialogue tool now works with a connected HomePod (2nd generation). The feature makes it easier to hear speech over other background sounds, thanks to audio processing in real-time combined with machine learning. If you do not have automatic updates set up, you can manually download the tvOS 18.2 update on your Apple TV by going to Settings > System > Software Updates.

>>>CP1154 Battery for Apple Airpods Pro A2084 A2083

Source(s)

Apple,Li Lin via Unsplash

Gemini can now give you the TL;DR of your Google Drive folders

When you don’t have to go through every file, ask Gemini to do it.

What you need to know

  • Google highlighted the rollout of Gemini in Drive, which aims to help summarize a user’s folders, documents, spreadsheets, and more.
  • Users can write their query for a folder in Drive’s side panel or they can navigate to a folder and hit the “summarize folder” button.
  • Google recently updated Docs with additional Gemini help for crafting formatted documents while also unveiling Gemini 2.0.

Google is rolling out an update for Drive users that brings Gemini into its side panel with new tools.

The company highlighted the latest update in aWorkspace post, stating Gemini can now summarize documents in Drive. Google explains that Gemini in Drive can only answer questions about your “text documents, PDFs, spreadsheets, and presentations.”

More specifically, with Gemini entering Drive’s side panel, Google states users can write their queries about a folder before the “@” symbol and the name of the folder; i.e., “summarize the files in @batterymap.”

Additionally, Google gives the example of asking about the “theme of the content” within a folder.

Writing your prompt to Gemini isn’t the only avenue toward quick information as users will find a starry icon button in folders, too. Once you receive this update, navigating to a foldershoulddisplay a “Summarize this folder” button beneath the navigation bar. Clicking this will automatically inform Gemini of your request and produce the side panel with its generated information.

There will also be a “suggestions” option alongside the likely ability for users to expand on what they’d like Gemini to surface via the text field.

>>>W18-030N1A Charger for Google Home Nest Hub Max Audio Charger

(Image credit: Google)

Alternatively, users can right-click on a document in their list and click “Ask Gemini” for information that way. The side panel expands its uses by letting users drag and drop documents into it instead of the “@” mention method.

The update started rolling out on December 11 for users under rapid and scheduled release domains. Workspace customers with Gemini Business, Enterprise, Education, Education Premium, and Google One AI Premium add-ons will have access to Gemini in Drive’s side panel for summarization.

Moreover, the company states users need to have “smart features and personalization” enabled before this feature is usable. Admins can turn this on by default for users if need be.

Gemini’s capabilities across Workspace have consistently grown, especially through itsrecent update for Docs. The AI utilizes a prompt — “help me create” — which is reminiscent of its recentsmart home testfor Google Home. Regardless, the Google Doc version lets the AI help users create formatted documents from scratch. The AI can also easily grab files from your Drive and incorporate them into a new file for you.

>>>C1552B Battery for Google Pixel C Tablet

Elsewhere, Gmail picked up extra Gemini help via “contextual smart replies.” The update to its AI-generated replies will take into account what’s been said in your current line of messagesbeforeoffering a quick suggestion. Additionally, Google unveiledGemini 2.0this week, which prepares to usher in a new “agentic era.”

Keynote, Pages, and Numbers just got way better with this free Apple Intelligence update – here’s how

Intelligent Keynote, Pages, and Numbers

iWork review

Apple’s iWork suite is available for iOS/iPadOS devices and macOS.(Image credit: Apple)


  • Apple has updated its iWork suite of productivity tools to version 14.3
  • The new version brings support for Apple Intelligence on iPhone, iPad, and Mac
  • Users can use Writing Tools and Image Playground within Keynote, Pages, and Numbers

Applehas updated its iWork suite of productivity tools including Keynote, Pages, and Numbers to includeApple Intelligence, a major free AI update.

The 14.3 update brings AI benefits to Apple’s equivalent toMicrosoftOffice, including Writing Tools, which allows you to proofread, summarize, and compose text for your documents. Writing Tools has been available for iPhone, iPad, and Mac since September, but now you can easily access it via the Apple Intelligence button in iWork.

Writing Tools also lets you reword your writing with preset tones, as well as give prompts to nudge Apple Intelligence in a certain direction. For example, you could tell it ‘Make this text more exciting’ and Apple will work its magic.

Writing Tools isn’t the only new Apple Intelligence feature available for Keynote, Pages, and Numbers. Image Playground, Apple’s take on the best AI image generator, is also included, enabling you to quickly add images to your documents for a touch of color and creativity.

Apple Intelligence in iWork is compatible with all M-series Macs, M-series iPads, theA17 Pro iPad mini, iPhone 15 Pro and Pro Max, and all iPhone 16 models.

>>>A2224 Battery for Apple iPad Pro 11 2nd Generation

Power up your workflow with Apple Intelligence

(Image credit: Apple)

Apple Intelligence in iWork isn’t the only big new AI update for your iPhone, iPad, or Mac. Apple’s release ofiOS 18.2, iPadOS 18.2, and macOS Sequoia 15.2 is a huge step forward for the rollout of the company’s AI tools.

With new features like Genmoji,ChatGPTintegration in Siri, and Mail categorization, there’s plenty to help you improve your workflow alongside iWork’s new Writing Tools and Image Playground features.

Apple Intelligence is still not complete, however – we’ll need to wait until March or April 2025 to see Siri get personal context and on-screen awareness, which should help tie all of these AI tools together. As it stands, Apple hopes you’ll use Apple Intelligence when you need it, peppering AI features throughout theoperating system. This approach lets you use Apple Intelligence only if you choose to do so, which is a far less intrusive approach than is the case with some other AI products.

Whether or not Apple Intelligence can significantly improve your productivity will depend on how you use your Apple devices; but adding proofreading and image generation to iWork is a great place to start.

Your Google Docs work may be about to be more beautiful than ever before

40 new templates and Gemini-powered creation coming to Google Docs

Creating smarter and better-looking documents onGoogle Docsis set to get a whole lot easier thanks to a host of new upgrades heading to the service.

Theword processortool has introduced new implementations withGoogleGemini which look to make creating stand-out work simpler than ever.

But theGoogle Workspacetool has also revealed a collection of 40 new high-quality, visually modern designs in Google Docs, giving users a selection of new options to make your documents really shine.

Google Docs and Gemini

Google Docs help me create Gemini tool

(Image credit: Google Workspace)

The introduction of Gemini’s “help me create” tool followssimilar launches in Gmail, and will give Google Docs users the opportunity to craft an entire document with a single prompt.

The tool will then pull the necessary information from a user’s Google Drive files, creating, “a long-form document with cover images, in-line images, stylized text, tables, content from your Drive files, and more”, the company said in ablog postannouncing the news.

Users can click to create at the top of a new document, or go to File > New > Help me create, to start describing the document they want to create. You can also choose from a number of pre-set start prompts to make things quicker, with examples such as creating a meeting template for a daily catch-up, a checklist for planning an event, or a roadmap for a product launch.

“Help me create” in Google Docs is available for Google Workspace customers with Gemini Business, Enterprise, Education, Education Premium, and Google One AI Premium add-ons, and only in English for the moment.

>>>W16-045N5A Charger for Google Pixelbook 45W USB Type-C Charger Power 3.0 USB-C – BRICK ONLY

Google Docs new templates

(Image credit: Google Workspace)

To make your documents look even better, Google Docs has also launched 40 new templates which include a number of useful new features to ensure your work stands out.

This includes document tabs to keep your documents organized, placeholder chips to make it easy for users and collaborators to add data, and building blocks, pre-set layouts and styles give your document a premium look and feel.

“Docs templates help users save time since they don’t have to build documents from scratch, create more uniform, high-quality, visually-appealing documents, and enable them to be more productive with the latest Docs features in their daily processes,” the company noted in ablog postannouncing the news.

>>>DVT3-2 Battery for Google DVT3-2,Project Tango Tablet

The new templates are available to all Google Workspace customers, Workspace Individual Subscribers, and users with personal Google accounts.

Microsoft finally delivers AirDrop-style file sharing between iPhones and PCs – here’s how it works

AirDrop for all your devices

Phone Link for iOS

(Image credit: Microsoft)


  • A new Windows feature lets you share files between iPhones and PCs
  • It’s a lot like Apple’s AirDrop feature, but works across operating systems
  • It’s limited to Windows Insider Program users for now

Apple’s walled garden makes it incredibly easy to share files between your Apple devices quickly and easily, but things get a little trickier when you want to link up your iPhone and aWindows PC. That could be changing, though, as Microsoft has just given you a new way to share files across devices that mirrors one of Apple’s best features.

The update has come to the Phone Link app for Windows and the Link to Windows app for iPhone. In anew blog post,Microsoftrevealed that when you’re running the latest version of each app, you’ll be able to share files between your devices with just a few clicks. That’s similar to Apple’sAirDrop feature, which allows you to send files back and forth between your Apple devices without having to do anything clunky like attaching them to messages or emails.

To send a file from your iPhone to your Windows PC using Microsoft’s new method, find the file in question and select the share button in iOS, then tap Link to Windows and pick the device you want to send the file to. To do the reverse (that is, send something from a Windows PC to an iPhone), right-click the file in Windows and choose Share from the context menu, then select “My Phone.”

This is a far easier way to move files between your devices, even if they’re bound to different ecosystems. Previously, it was common to use a third-party app like Dropbox or Google Drive to share items, which often required you to manually upload and download files in a much more laborious manner. That means Microsoft’s latest feature is a welcome one, especially if you use devices made by both Microsoft and Apple.

>>>G3HTA071H Battery for Microsoft Surface Laptop Studio 1964

Share the wealth

(Image credit: Apple)

We’ve seen something like this before. In August 2024, Microsoft introduced a similar feature forwhisking files between Windows and Android. It seems that Microsoft has been encouraged by that feature and has now expanded it to work with Apple devices.

Microsoft has laid down a few more requirements for this new feature to work. Aside from running Phone Link (version 1.24112.89.0) and Link to Windows (version 1.24112.73 or higher), you’ll need to have installed iOS 16 or later on your iPhone, be runningWindows 10orWindows 11on your PC, and be signed up for the Windows Insider Program.

With any luck, this feature will be rolled out to users who are not part of the Windows Insider Program over the next few weeks. Once that happens, it should make life a lot easier for anyone who uses both an iPhone and a Windows PC and wants to share files between them.